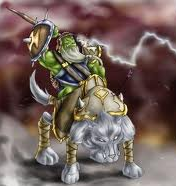
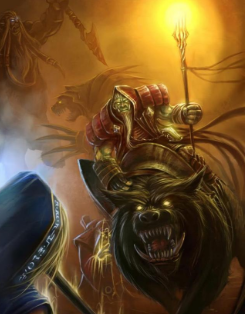
Check out the this latest Hero Guide of Chen, the Holy Knight. This guide was submitted in the fifth Hero Guide Contest held by the Strategy section of the DotA-Allstars forums has ended recently. Competition was tough with fifteen guides in contention for the top prize. After the dust has settled, Beast_Pete and MasterJoe’s collaboration, a guide on the Holy Knight, Chen, has emerged victors.
Chen ~ The Holy Knight – Written by MasterJoe and Beast_Pete Updated for Version 6.41
Table of Contents
I. Hero Overview
II. Skill Descriptions
III. Skill Build
IV. All About Creeps
V. Microing/Controlling Your Creeps
VI. Mastering Ward Usage
VII. Item Build
VIII. Strategy: Levels 1-2
IX. Strategy: Levels 3-6
X. Strategy: Levels 7-11
XI. Strategy: Levels 12-16
XII. Strategy: Levels 17-25
XIII. Counters to Chen
XIV. Replays
XV. Conclusion
I. Hero Overview
Affiliation: Sentinel
Location: Sunrise Tavern


Base Damage: 43-53
Starting Armor: 1
Starting HP: 530
Starting MP: 273
II. Skill Descriptions
 Penitence
Forces a unit to accept punishment for its sins, causing it to move slower and accept more damage from attacks and spells. Lasts 7 seconds.
Level 1 – 8% movement speed reduction, and 7% increased damage taken.
Level 2 – 16% movement speed reduction, and 14% increased damage taken.
Level 3 – 24% movement speed reduction, and 21% increased damage taken.
Level 4 – 32% movement speed reduction, and 28% increased damage taken.
Notes: The increased damage taken stacks with the Corruption effect of Desolator. This is one of your abilities to help set up for a kill in most situations.
 Test of Faith
If cast on enemy, will deal variable damage based on the unit’s faith. If cast on allied Hero, it will teleport the hero to safety. Instantly teleports Chen’s persuaded units to safety.
Level 1 – 50-100 Damage to foes, 6 second casting time for allies.
Level 2 – 100-200 Damage to foes, 5 second casting time for allies.
Level 3 – 150-300 Damage to foes, 4 second casting time for allies.
Level 4 – 200-400 Damage to foes, 3 second casting time for allies.
Notes: In our honest opinion, this is a pretty useless skill. You need your other two main abilities before this, and after you max those two out, you will not need this nuke to kill heroes. The only thing that you would probably get it for is the teleport for your teammates to get an easy fountain trip or for the instant teleport for one of your creeps. Also skipping this skill makes sure you won’t run out of mana fast because of nuke-spammage.
 Holy Persuasion
Takes control of a target enemy unit.
Level 1 – 1 Unit Max. 75 HP Bonus.
Level 2 – 1 Unit Max. 150 HP Bonus.
Level 3 – 2 Unit Max. 225 HP Bonus.
Level 4 – 3 Unit Max. 300 HP Bonus.
Notes: This is what makes you different from all the other heroes in the game, the ability to take control of three units. This is the ability that makes Chen so powerful, even after it got nerfed from 4 units max to 3 units max. You can persuade any enemy unit and neutral creeps except the Ancients.
 Ultimate – Hand of God
Fully regenerates your converted creeps. Heals all allied heroes on the map.
Level 1 – 200 HP Healed.
Level 2 – 300 HP Healed.
Level 3 – 400 HP Healed.
Notes: A great ability when used in team battles, saving allies, or healing your creeps after they lost a bit of health. 2000 heal over 5 heroes is nothing to scoff at and especially against AoE nukes this is a precious skill.
III. Skill Build
-
- 1. Holy Persuasion
-
- 2-3. Penitence
-
- 4-5. Holy Persuasion
-
- 6. Hand of God
-
- 7. Holy Persuasion
-
- 8-9. Penitence
-
- 10. Test of Faith
-
- 11. Hand of God
-
- 12-15. Stats
- 16. Hand of God
Skill Build Justification
1. Take Holy Persuasion at levels 1, 4, 5 and 7. The number of creeps you can persuade stays at 1 from level 1 and level 2 Holy Persuasion, thus leveling it up again at level 3 is pretty useless. Instead, take it at levels 4-5, as a level 2 Penitence is much more useful than a level 2 Holy Persuasion. It’s important to start with Holy Persuasion, as it’s quite possible to get first blood if you can find a Centaur or a Furbolg as your first creep to dominate. Also, if you don’t find any good creeps to help you out in ganks, you can already start leeching XP in the forest, while on the 3 lanes only 4 heroes from your team are sharing experience. This means that your whole team gains more levels than the opposing team and this is just one of the reasons why the Holy Knight is the most powerful heroes in higher level games.
2. Penitence is taken at levels 2 and 3. This is a very powerful skill in ganks and as your early game revolves around ganking it shouldn’t be a big surprise that you level it up before Test of Faith. Penitence allows you to slow down a target and if you have an ally with another slow it will be sure that your Centaur or Furbolg can place its Stomp perfectly allowing you (or your ally) to score a First Blood or around frag at the ganked lane.
3. Max out Penitence at levels 8-9. By this time, you have already finished maxing out Holy Persuasion and the slow given by Penitence will help you a bundle in ganking and killing heroes.
4. One level of Test of Faith is gotten at level 10. This will be used to teleport allied heroes to the base when they are in trouble or in need of a quick fountain trip. It can also be used to instantly teleport one of your creeps home if they need to heal. Do not level this up beyond level 1, as by the time you max it at level 14, you will no longer need it to kill heroes and the decrease in the time to teleport a teammate back home is pretty much negligible. If needed, you can take a level of this earlier by replacing a level of Penitence.
5. Get Hand of God whenever you can. There should be no reason whatsoever to skip this ability.
6. After level 16 it’s all up to you, but we would suggest maxing Attribute Bonuses before ToF. However sometimes it might be useful to max it between levels 17 and 19, it’s all up to game situation and personal preference.
IV. All About Creeps
In this section, we will go over everything there is to know regarding creeps. This will include where they are located, their stats, their abilities, etc. This is a very important section in our guide, so please do not skip over this section.
Location of Creeps
There are 10 neutral creep camps in which there are creeps you can persuade. The other 3 creep camps on the map include the Ancients (1 on Sentinel, 1 on Scourge) and Roshan. These creep spawns will never spawn any creeps that you can persuade, thus they will be left out of this section.

Here is an enlarged mini-map with spots showing where the neutral creeps are located. We will align all the useful creeps and give information about them regarding stats, skills and when to dominate them.
Centaur Khan and Polar Furbolg Ursa Warrior
The Centaur Khan and Polar Furbolg Ursa Warrior are the most powerful creeps to persuade in the game. The main reason is because of the fact that they have the best ability among the neutral creeps, Hoof Stomp. One of these two should be the first creep you persuade, as it will allow you to get kills and gank effectively. The Polar Furbolg Ursa Warrior is slightly better than the Centaur Khan in early game because he has 100 mana more, which means one more stomp. As the Centaur lost its MS bonus from Endurance Aura and gained an IAS bonus he is better used for pushing as he increases the DPS of all nearby friendly units a lot overall.
Centaurs can be found at the Orange Creep Spawns and the Furbolgs can be found at the Blue Creep Spawns.
Satyr Hellcaller and Kobold Taskmaster
The Satyr Hellcaller and Kobold Taskmaster will be your second and third creeps you persuade. The Satyr has Unholy Aura which increases HP regeneration by 2 per second (he does not have MS bonus any more). The Kobold Taskmaster has Speed Aura, which gives 12% increased movespeed. It used to be really imba. Having the Incredible Trio of Centaur, Satyr, and Kobold made it possible that most of your allies (if not all) had a movespeed of around 500. Pushing, ganking, and retreating were really easy.
However since the 30% overall MS bonus was reduced to 12%, new strategies are to be used. Chasing became a bit more difficult, so you can go two ways: 3 Satyr Hellcallers for the tower destruction, 1 Kobold, 1 Centaur, then another Centaur or a Furbolg.
Satyrs can be found at the Blue Creep Spawns and the Kobold Taskmasters can be found at the Orange Creep Spawns and Green Creep Spawns.
Ogre Magi and Forest Troll High Priest
If you cannot find any of the above 4 creeps, then the Ogre Magi and Forest Troll High Priest are the next to persuade. These are the next most useful creeps. Ogre Magi has Frost Armor, which gives +8 armor. It has a low cooldown, so you can have it on most of your allies and creeps. The Forest Troll High Priest has the ability to heal and Abolish Magic. If you are low on health, just persuade one of these and make it constantly heal you. It’s like a slow healing fountain. Abolish Magic is very useful in removing buffs from enemies. If there is an enemy Sven with God’s Strength activated, use Abolish Magic on it and watch him cry because he got owned to a weak neutral creep.
Ogre Magis can be found at the Blue Creep Spawns and the Forest Troll High Priests can be found at the Orange Creep Spawns and Green Creep Spawns.
Other Creeps
The Satyr Soulstealer might seem decent at first because of mana burn, but you should rarely ever persuade this creep. The mana burn only burns 100 mana and the creep is way too fragile to be of any use in team battles. However in early game it might be decent against heroes like Bane Elemental, to prevent disable/nuke combos that might kill your ally in the lane. Heroes like Medusa and Sand King suffer a lot from manaburn too, so use this creature against them for the win.
The Satyr Trickster might also seem like a decent creep at first because of Purge. Purge slows the movement of its target by a factor of 5 for 5 seconds and deals 400 damage to summoned units. However, this creep is way too fragile to be of any use.
Any other creep is completely worthless to persuade unless you need to farm/level up and you don’t have any other creeps to dominate.
For all the information about creeps, we suggest reading MrX’s Neutral Creep Guide.
V. Microing/Controlling Your Creeps
Now that you know what creeps to persuade, it’s time to learn how to use them. It won’t be easy and by only reading this guide you won’t automatically become a good microer. It demands lots and lots of practice. This part is just a guidance on how to group your creeps, which one to send where and when to use certain abilities.
Group A: Your hero and creeps
Group B: Your hero
Group C: Your creeps
This is the general way that most players group their creeps. However, if you like it some other way and it’s more comfortable to you, then feel free to change it around. This is just a general outline. Of course you may choose to have other groups as well, but these 3 groups are always needed in order to be able to navigate your units to same or different directions. When you wish to change to different units while still moving together with the others, press tab so many times until you reach the creep you wish to use an ability of. Learning hotkeys of every single creep is crucial as you won’t be able to respond fast enough else and you might miss some spells just because of being slow. Some examples are Stomp (Centaur/Furbolg), Shockwave (Satyr Hellcaller) and Mana Burn (Satyr Soulstealer). You can learn more about hotkeys in the neutral creep guide we linked earlier.
Now let’s see when and how to attack in early game. When you are level 1, you need to find a Centaur or a Furbolg for the stun. If you are lucky enough to find one, go and hide behind the trees like this:

If you click on the thumbnail, you can see how Beast_Pete’s Chen comes out with his fancy new Furbolg. This is the perfect hiding spot and timing for backstab because even during the day you are not visible from any of the entrances, if you held your position while the creepwave arrived. So wait until the next creep wave comes. This is important for the following reasons:
1: If you are coming out in the wrong time, their newcoming creeps might reveal you way before you could reach the opponents.
2: More creeps mean more obstacles, so it will become more difficult for your opponents to retreat alive.
So after the creepwave arrived AND your enemies and the creeps are under the following line, you can come out for the backstab.
Now that you know how to group them seperately, you know when to come out of the fog of war, it’s time to learn how to position your creeps. The first creep to enter the line is a stomper creep. Try to get in the fleeing way of the hero, so he/she can either get into your Centaur’s/Furbolg’s hands or into your ally’s/allies’ hands. When he/she gets in range, use stomp. Second unit to follow up is Chen himself. If you are at least level 2, use Penitence on the target immediately. This helps in using stomp in time, and for your allies to catch up. Also the added damage he/she will be dealt is something to note.
Try to use your creeps for blocking the fleeing route. It’s not easy, it’s really not easy, but once you learnt how to do it, it will be a very useful technique. If you have a Satyr Hellcaller, use his Shockwave after Penitence is casted on the target. 100 damage isn’t that much, but thanks for Penitence it will be a bit more. Also, if you cast it at the start, you’ll be able to cast it again later if the enemies reach their towers and you can get the “last hit” on them.
VI. Mastering Ward Usage
Why should Chen get wards?
Chen is possibly the best ward carrier for the Sentinel team. There are 3 reasons why:
1. Chen spends most of his time in the forest. Unlike most other heroes who spend most of their time in their lanes farming and controlling their lane, Chen spends most of his time in the neutral creeps looking for creeps to persuade. This means that he has easy access to the best places to ward, and that he doesn’t miss out on EXP just for putting wards like other heroes.
2. Chen is not item dependant. Most of his power comes from his abilities and his creeps. Unlike heroes like Troll who needs tons and tons of damage items to actually deal damage, Chen only needs a select few items to be useful to his team. Therefore, by buying wards, he isn’t losing a lot of his potential as opposed to a Troll buying wards when he needs his Aegis/Rapier/BKB as fast as possible.
3. Chen must use Sentry Wards to destroy Observer Wards that the enemy team uses to stop neutral creeps from spawning. The best counter to Chen right now is to use Observer Wards and place them in neutral creep camps to stop them from spawning in the early parts of the game. Without good neutral creeps, Chen loses almost all of his abilities to play his role for the team. To counter the Observer Wards, someone must buy Sentry Wards and place them to kill the Observer Wards. As Chen is going to head to the forest anyway and as he is the one that really needs the neutral creeps to spawn, he is to buy sentries.
Before we move onto the specific wards, we would suggest reading -madee[NERV]’s Guide to Using Wards.
Using Observer Wards
Generally, a guide wouldn’t go into detail regarding using Observer Wards. However, Observer Wards are too important for Chen to skip over in a Chen guide. The strategy regarding Observer Wards will be Chen specific here. Any other Observer Wards strategy can be found in -madee[NERV]’s Guide to Using Wards.
For Chen, there is one use of Observer Wards. That one use is to place them in common gank areas so that Chen and his team will prevent dying. There are two very important places for Chen to place Observer Wards, and one place as a decoy. Chen should 99% of the time take bottom lane, because the neutral creeps there are the easiest to access. Therefore, the wards will only focus on bottom lane.
Area 1

This should be the first place you ward with your Observer Wards. Many people will try to gank you while you are neutral creeping, and an Observer Ward here will allow you to see incoming ganks from both entrances into the forest from the right side. An Observer Ward here will save you many times.
Area 2

This should be the second place you ward with your Observer Wards. Another entrance that enemies will try and gank you from is through the river, and an Observer Ward here will allow you to have vision of incoming heroes in that direction. This area also allows you to have vision of the runes, which is an added bonus.
If the enemies are smart and place Sentry Wards in the same area above and kill your Observer Ward, then you have two options. One is to buy Sentry Wards of your own to destroy theirs, and have a crazy back-and-forth Sentry Ward fight in that area. The second option is to place an Observer Ward in a similar area but cannot be seen by a Sentry in that area. Since this is an Observer Ward section, so we will go with the second option.
Area 3

If the enemy has Sentry Wards to destroy your Observer Wards in Area 2, you will have to place your Observer Wards here. Sentry Wards in Area 2 are not able to see this area, and the only way anyone can see this area is if they place a Sentry Ward there themselves. Most do not know this area, so you shouldn’t have to worry that much about enemies destroying your Observer Ward here. If they do, however, destroy your Observer Ward here, then you have no other option than to buy Sentry Wards yourself.
Using Sentry Wards
Sentry Wards are very important items for Chen. One way that many people counter Chen is to use Sentry Wards/Observer Wards and place them in neutral creep camps, which stops the neutrals from spawning. Sentry Wards are needed to destroy the enemy wards so that the neutrals can continue to spawn. As you know, Chen without good creeps means that Chen loses almost all of his potential. This is why Beastmaster’s Hawk should scout the sentinel forest for scourge heroes who are possibly placing wards to counter neutral creeps from spawning. If no wards are placed by the Scourge then you can get chicken + obs wards otherwise you have to delay buying chicken (or passing this role to an ally) and getting sentry wards instead.
When placing Sentry Wards to destroy enemy wards, you must not place your Sentry Wards where it will have vision of the neutral creeps. If you do place them in and they do have vision of the neutral creeps, not only have you wasted the ward, but you have done the job for the enemy team of stopping neutrals from farming. The worst thing is, there is no way to destroy your own ward, and you have basically countered yourself for 8 full minutes. The only thing you can do is to hope and pray that the enemy will place another Sentry Ward in the same area and destroy your Sentry Ward, in which case you can place another Sentry Ward where it doesn’t have vision of the neutral creeps and destroy it.
Bad Sentry Ward Usage
Here is an example of the wrong way to use Sentry Wards. The Sentry Ward has vision of the neutral creeps, and you have successfully stopped your own neutrals from farming and countered yourself.
Good Sentry Ward Usage

Do you remember Area 2 from the Observer Ward Usage section? Well, placing a Sentry ward there will allow you to see wards in this creep camp. If the hero isn’t present at the creep camp, it won’t have vision of the creeps, and it won’t stop the neutrals from spawning. Therefore, Area 2 is a very good place for Sentry Wards.
This is also a very good place to put a Sentry Ward. Look at the first picture. In this picture, you can’t see the neutral creeps on the other side of the trees, and this area lets you have good view of the river and entrances through that area. Now look at the second picture. On the other side lies an enemy ward, which the Chen kills. This area won’t stop neutrals from spawning, and the view of the river is comparable to Area 2.
There is also another use of Sentry Wards, and that is to place them in the areas specified in Observer Ward Usage, but with Sentry Wards instead. If the enemy begins to put Sentry Wards in those areas, then you will also need to put Sentry Wards in the same areas, to destroy theirs. This will probably begin “Ward-Wars”, but don’t fret. You are not item dependent and can afford to keep buying wards (unlike most other heroes), and the enemies will probably give up on the “Ward-Wars”.
VII. Item Build


| Chicken + Observer Wards + Tangos (520)
| Headdress of Rejuvenation (657)
| Boots of Speed (500)
| Mekansm (1777)
| Ring of Basilius (500)
| 2 Sets of Sentry Wards at the very least (750)
| 2 Bracers (1020)
Total cost: 5724
Item Build Justification
As stated in our Mastering Ward Usage section, Chen isn`t an item dependent hero, and this applies even to early game. Every team needs one chicken shared and it’s either you or THD who is going to buy it for the team. You don’t need much regen early game, so a Tango of Esssifation will be suffice, neither stat items, because you are killing neautrals and gank most of the time, so a boost on last hitting is not that crucial, neither a boost on health and mana. Chen needs Observer or Sentry Wards early due avoid early game ganks that the enemy might do to prevent you from getting good creeps. If they place wards to your neutral spawn spots then get sentries rather than “normal” observers. How do you which one you will need? Well in a league game you should have a Beastmaster ally who uses Hawk on the first level to scout wether the opponents are bringing wards or not. If not, then get chick+obs, if yes, then get tangos+sentries.
Headdress is a great item for Chen. When neutral creeping, your creeps will be tanking the damage, and they need some sort of regeneration or they will be forced to return to the fountain constantly to heal. Headdress prevents these fountain trips. This also upgrades into the very useful item Mekansm.
Mekansm is the first major item to get. If you are doing fine in early game you should be able to get it without buying Bracers first. The heal is really important because you are going to farm around in the forests and your creeps need to be healed up sometimes. The HP regen also helps in keeping your creeps in shape. As you won’t have mana problems, you are a great bearer of this item which will boost your support role even more in team fights.
Ring of Basilius is another great item for Chen. The extra armor helps when neutral creeping. Your creeps do not have any regeneration at all, but Ring of Basilius gives a fixed 0.65 mana regeneration per second, and it will prevent you from sending your creeps back to the fountain to heal mana. Now you might say that Basilius pushes early game, but you will rarely ever spend your time in the lane early game, so it won`t really push.
In team fights, AoE spells will be flying around, and many will target you to get rid of your Global Heal and Mekansm. You are very fragile and have very low health, so 2 Bracers are necessary to help you survive.
More Observer Wards/Sentry Wards are needed to help ward the areas specified in Mastering Ward Usage. If the enemies don`t get wards of their own, just keep getting Observer Wards. If enemies do get wards of their own, get Sentry Wards and destroy theirs.
Accessory Items
Ancient Tango of Essifation
If you really need more regeneration early because you are getting bad luck with the neutral creeps and you are forced to tank some damage, then get a couple more of these. It will allow you to tank the damage easier, and not lose a lot of health.
Observer/Sentry Wards
If your team needs more wards, then continue to buy Observer/Sentry Wards. You can get more wards then specified in the item buying order section. That is only a guideline of the minimum you should buy.
Scroll of Town Portal
This is a no-brainer, but still we don’t see it used that often even in inhouses either, so it gets his place in our guide. Until you get Boots of Travel (Travel>Treads for 81 out of 82 heroes), this is an essential item to get for defending and teleporting out of ganks. It is even more important to buy if you just don’t want to waste 2200 gold for the Travels.
Alternative Items
Aegis of the Immortal
This is one of the most frequently bought items in leagues, and probably one of the most useful. The survivability it gives matches any items against both nukers and physical damage dealers. Don’t forget the 3 reincarnations which are really helpful in late game when the revive time becomes 60-90 seconds. It’s also a rather cheap and easily built-up item. So against good teams we would recommend Aegis.
Eye of Skadi
In games where you are doing really fine and farming is smooth, Skadi might be a good choice. The Frost Attack + Penitence will ensure that the target will be slowed to hell, which allows your team and your creeps to rape him. Also this is a good item for boosting survivability as well. However, it doesn`t add as much survivability as Aegis and it is much more expensive.
Necronomicon
There are certain conditions in which to buy Necronomicon. One condition to buy it in is if you don`t have any allies that are making it. Atleast one Necronomicon should be on each team (Beastmaster is getting it most of the times, but if your BM player fails in microing that many creeps, then it’s you to get it), because it gives very helpful auras such as the movespeed increase and attackspeed increase. They also give you the very helpful Mana Burn to get rid of the mana of pesky spell casters and the mana break which will help as well. The necronomicon demons are working really well with your neutral creeps and also helps pushing. The boost on STR is also something to note.
Ohh and contrary to common beliefs, the 3/6/9% movementspeed Endurance Aura does not override Kentaur’s 10% Endurance Aura. Always the higher value prevails and this aura is not an exception either.
Helm of the Dominator
If the enemy team decides to go mass Hand of Midas, then you might want to get this item. Creeps that are dominated are unable to be Transmuted, so this item is a pretty good counter to Midas. However, if the enemy does not get Midas, 3 creeps is more than enough, and this item isn`t recommended.
Eul’s Scepter of Divinity / Guinsoo’s Scythe of Vyse
When your team lacks disables, it is your role to buy a Eul’s and upgrade it into a Guinsoo’s later on. Though the mana regeneration isn`t needed, it does provide you 6 very helpful Cyclones and unlimited amounts of Hexes.
Items Not to Get
Manta Style
Manta Style is a very poor item choice for Chen. Your images have barely any damage or health at all, so they are very useless in those aspects. AoE spells easily get rid of them, and you don`t really benefit from the attributes at all. Yeah, it gives 250 health, but there are much better ways in doing so. It may seem like a fun item to get on Chen, but please don`t get it. There are much better items than this.
Refresher Orb
Nope, again it’s not needed. You can’t have 4 necro demons anymore, neither 4 illusions, your ultimate does not need to be used twice in a row most of the times, and you have Mekansm anyway. You absolutely don’t benefit from this item.
VIII. Strategy: Levels 1-2
Before you head off to your lane, buy your items and summon your Chicken. Share control with all of your allies if you can trust them (usually in inhouses and clan matches, not in pubs). Then head off to your lane, and stand near your 2nd tower and wait for the creep block. When creeps spawn, do the normal creep blocking procedures so that the creeps are nearer to your tower and your side of the map, making yourself less vulnerable to ganks.
Choose a lane with a hero that can slow or stun. Some examples may include Vengeful Spirit, Bristleback, Twin Headed Dragon or Enchantress. These heroes will help you position your Stomp from your creeps easier and make getting kills much easier. And yes, even Enchantress. Against Viper and such she is not getting the slow but when Chen helps her she can consider gettign it, but even if she goes for heal+impetus she is still very good, because penitence will increase the damage out put done by impetus a lot.
When the neutral creeps spawn (2 minutes in Team Pick, 4 minutes in League Mode), head off into the forest and look for a Stomper. If you can get a Stomper, immediately set up for a kill in your lane. If the heroes are under the line specified in the Microing/Controlling Your Creeps section, then go for the kill. Have your ally disable/slow the most fragile enemy, while you enter from the back. If you are level 2, you can use Penitence. If you aren`t, then don`t worry. Enter with your Stomper first, position the Stomper next to the hero, and immediately Stomp. Have both your hero and Stomper attack the hero. In most cases, this means first blood. If this doesn`t happen, back off (and eat a Tango). Look for other opportunities to do so, or just go back to neutral creeping.
If you cannot get a Stomper, we recommend that you wipe out all the neutral creep camps and try to get one as soon as possible. Once you do get one, follow the procedures above.
Place the wards where we specified, and always be on the look for ganks. Many people will search for you in the forest, so you have two options when they do so. You can ping to your ally and both of you guys can gank the gankers, or you can just back up until they return to their lane, and continue neutral farming.
Many people dislike forest creeping in the first 2 levels. However it’s mandatory to clear all the neutral spots if you can’t find a stomper. If you found a stomper and you could not backstab successfully then of course you are going to stay in bottom lane with your ally and when your stomper returns, then you go backstab them with that creep while rushing in front of them with your hero and ally.
Also, when you took control of the bottom lane you can leave your ally alone to leech all the EXP and gold while you are leeching those from the forest.
IX. Strategy: Levels 3-6
These are the levels when you can finally use Penitence more successfully. Even if you don’t have a stomper, you can possibly net a kill or two when backstabbing the opponents. If lacking stompers, get a Satyr Hellcaller as Shockwave enchanced with Penitence can deal a nice amount of damage and sometimes you can even cast it twice. At level 5 you can finally have 2 creeps, which allows you to farm in the forest smoothly and get frags more successfully.
When you reach level 6, warn your allies that now you have Hand of God ready when needed. When they call for a heal or you and your creeps are in trouble, use it immediately without hesitation. Don’t be too worried about your level. If you did your job well as a ganker you should be higher leveled than the opponents in your lane. It’s not a big case because from level 7 you have three creeps and they are the ones that count, your Hand of God and Mekansm heals.
Sometimes it happens that you screw up the first 2-3 backstabs and either you or your ally gets killed. Don’t worry, you can still be helpful for your team, you just have to calm down and play rather safer. Farm in the forest, try to level up till level 7, when you can finally have 3 creeps. Don’t try to backstab enemies except if multiple allies help in.
X. Strategy: Levels 7-11
Now the time has come for you to build up the army of the Incredible Trio. With a Boots of Speed and the insane MS aura of the 3 different creeps you and your allies can easily chase down any hero. Start destroying each outer towers with the help of your allies. This is the time when carry heroes still would like to sit in their lanes, so their whole strategy might get screwed up by your early push (only heroes like Pugna, Lucifer and Krobeleus could stop you and most of the times even they aren’t enough).
Whenever one of your creeps die, and your allies decide to farm/shop/counter push go and find a replacement fast. It’s not mandatory to have the trio up all the time as long as you have a Kobold Taskmaster, which can easily be found. When you are set for push again, go ahead and join or call your teammates.
Controlling the map is the most important thing in this game. If the Sentinel took control over the map, you can finally place your wards to the best places and generally you don’t need to use up as much of them as the Scourge team. Also you will be free to kill neutrals and you will have enough time to spend on finding and dominating better and better ones.
In case you lost control of the map, try to spend less time on persuading creeps. Get a Kobold Taskmaster for better positioning, but if you can’t find a Satyr or a Centuar, don’t try so hard, because it’s quite likely you will be ganked or you won’t be able to help out when it’s time to defend a tower. Play conservatively, and wait for the chance when you can gank and kill a lonely hero. If that happens, then congratulations, you took the first step to gain back map control. Now go ahead and push down a tower. Don’t be greedy however, if you push for another tower, they might get strong again for defending and counter-pushing. Retreat after the successful push and search for neutrals.
XI. Strategy: Levels 12-16
This is the time of the game when you are supposed to finish it. Put the opposing team under constant pressure by pushing multiple lanes while netting the neutral kills as well earning more gold and experience. You need to decide which way to go: Aegis, Skadi or Necronomicon. If you wish to decide the outcome of the game faster, get Aegis. This is one of the game-breaking items as it gives far the best survivability, and the 3 charges of reincarnation lets you decide a game with one big push (for that you need BoT as well, another game-breaking item). Get Skadi if you wish to have fun with Penitence + Frost Attack. Necronomicon is for the cheese MS and AS, as well as the mana burn which can basically take out one caster, but this item should be gotten by the Beastmaster if you have that hero in your team.
Wait for the best moment to push. By outfarming and outleveling the opponents, you assure that they will try to break out once. You must take this chance and kill them in the 5v5 fight. With a good line-up your success is almost guaranteed as the Sentinels are way better in 6.37 than Scourge. In pub and -ap games it may differ though, but you should have a good judgment on when to provoke a 5v5 fight and when not. Best case is when you can kill a lonely hero and push 4v5 and if that happens you shall not hesitate, you have to push immediately. Deciding the outcome of the game as fast as possible is crucial. Also if you have a Vengeful Spirit she can simply Nether Swap a defending hero and you can fight in 5v4.
What should you do if the opponents have control over the map? “Surprisingly” you need to play defensively and trying to avoid getting ganked. With proper warding you should be able to search for neutrals without fear of getting gang-raped even if you lost map-control. Invest more into wards both observer and sentry ones. This way you have a chance to gain back the control over the map.
When defending, try to hold back the scourge creeps with your dominated creeps. This will allow your allies to use their AoE nukes properly, your tower to hit creeps from far range and stopping the enemies from rushing inside. But keep an eye on their health as losing them means losing your out-runners.
XII. Strategy: Levels 17-25
Most of the times you won’t reach this point of the game or if you do it’s already decided anyway. There’s not much more to add to the above written strategies. The only thing to mention is that now even if you have less map control, you can come back easily with a successful gank followed by a push. Most important is having a Kobold Taskmaster with you all the time. The 15% bonus is crucial for positioning and chasing.
At this point of the game, the power of the creeps begin to lose power. However, the auras do not. Many heroes can begin to 2-3 hit kill your neutrals, so relying too much on your neutrals is a bad thing. The most you can do with them is to help neutral farming, fending off a push, or to tank a tower.
XIII. Good Allies
Here we will give 2 examples for each type of heroes. If you get the idea, you can come up with other names as good allies, so no need for more than 2 examples. Also we will mention the most possibly best Sentinel combo that exists in 6.37.

 Aiushtha & Jakiro
 Slowers: Any hero with a spell that slows a target (or units in an area) are considered to be good allies for the Holy Knight. Penitence + a second slow is cheesy and almost guarantees a kill especially in early/mid game. Aiushtha is also fun to play with as she can dominate creeps as well (presentated in one of the replays). Jakiro with 2 AoE nukes and one AoE disable is especially good in ganks and having another AoE guy with you leads to successful early kills.

 Syllabear & Rexxar
Pet Zoo: Having a large army allows you to push faster. A Spirit Bear with several auras will tank all the damage and proc entangle more often as well as having a higher DPS and maximum movementspeed. The Hawk will give better map control and the pig will be another great slow (penitence+second slow cheese, remember?).

 Vengeful Spirit & Sven
Disablers: They are good allies. ORLY? Well, it’s common knowledge, but Chen benefits from handful disables even more, as it allows his Centaurs/Furbolgs to position their stomps perfectly letting you net a fresh frag. Also, Sven has a nice armor boosting aura, and Venge boosts damage with hers. Disable cheese, aura cheese.

 Tinker & Zeus
Nukers: Penitence allows them to spam all their spells and it further increases the damage they can deal. It’s a really strong combo especially in early game.
4/4 means the sentinel imbas: Chen, Beastmaster, Jakiro and Vengeful. You should ALWAYS have them in your team if you want to win. Chen gives early gank and pushing powers, Beastmaster gives incredible good legal maphacking and his pig’s slow is also very useful while with Axes and THD’s Dual Breath they can immediately clear up one creep wave allowing you to push down a tower fast. Vengeful Spirit might not be that clear for you until you face a very strong and organized AoE scourge team. You simply cannot push inside their base if you have no Nether Swap. 2 AoE Nukes and a Nether Ward are enough to stop a Sentinel Push especially if you play in a league where backdooring is not allowed you won’t be able to do a damned thing without Vengeful Spirit.
Now the question is: which one is the 5th sentinel hero? A soloer who can face a Viper in mid lane. For that Enchantress is the best choice, but Syllabear isn’t bad either. Silencer is decent, but that’s not much a recommended choice. Tinker can take on Viper and can be a very strong late-game carry if things turn out not too well for your team.
XIV. Counters to Chen
Basically, with a good Sentinel team… there is no ultimate counter to Chen. Yes, please cry, but no, THD+BM+Encha+Venge+Chen will own your Scourge strategy if played well. But actually there are some ways to counter him and possibly (luckily) win the game.
Observer/Sentry Wards: At the begining of the game, buy a pack of observer wards and place them exactly on the neutral creep spawn spots. This will prevent them to spawn for 8 minutes or until the Chen player buys Sentry Wards. Try to maintain these wards as long as possible countering early ganks and pushes. This is especially important if you have an ally like Clinkz, Visage or Viper. If Chen destroys yours, continue to buy wards. You will be sorry if you don`t.
Broodmother’s Web: This hero is not suitable for leagues though, but in inhouses and pubs it could be picked. She can web all the neutral spots in the Sentinel forest and completely own you. The only option against this gal is to move to the Scourge forests (web prevents creepspawn in 6.38 and above).
Nerubian Weaver’s Watchers: Moving wards and they are cheap to maintain. When you are 100% sure that he has watchers around your neutrals, place Sentry Wards and kill them.
Doombringer’s Devour: This is risky, but with a good delay you can eat creeps before they could do much harm to you. It’s viable mostly in early game, because later you won’t just run in to get focus-raped.
Hand of Midas: Possibly the best way to counter Chen in mid-early game. A mass Hand of Midas team can put down Chen early, but not if Chen gets Helm of Dominator. However the Satyr Hellcaller cannot be transmuted, and now it’s too expensive to get it early enough.
XV. Replays
tPD_vs._TeG_1_ESL_Premiership – played by TeG-Rushmeplz
 tPD_vs._TeG_1_ESL_Premiership.w3g ( 1.1mb ) Number of downloads: 2193
Sentinel: THD+BM | Encha | Chen + Venge
Scourge: Bane+Witch Dr | Seeker | Doom + QoP
A replay presentating perfectly how to dominate with Sentinel and Chen in 6.37. TeG won MyM tournament recently, while tPD won CEVO, so it was a much awaited match. However even a team like Pandemic could not do anything against this imba Sentinel line-up. You can see how well Chen counter-wards with sentries while not preventing creep spawnage with his on wards. Also when they took over the map control he puts wards exactly to the places you must put wards as well. Just by watching this replay you should be able to learn every ward-spots that you need to memorize in an owning game.
This replay is recommended for those who want to see the highest level teams playing against each other using Chen. There is less neutral creeping done by Rushmeplz, but this replay perfectly shows how much he dominates his lane with the help of Vengeful Spirit.
DotA 5v5 Chen abuse xD – played by Beast_Pete
DotA_5v5_Chen_abuse_xD.w3g ( 584.6k ) Number of downloads: 1109
Sentinel: Spirit Breaker | Venge + Maiden | Chen + Encha
Scourge: Sniper | Mirana + Pugna | Jügger + Alchemist
This was a pub where I knew most of the players. I and my friend presentate how to dominate the bottom lane with the Encha+Chen couple. Luckily we get 3 stompers early and I get the First Blood at around 6:30. You can see many good and successful ganks and the 5v5 fights were totally dominated by us.
This replay is recommended for those who want to see the viability of Chen in pubs. Also it shows how to get first blood and dominate your lane with repeated ganks.
DotA 5v5 Chen with reindeer 9-0 – played by Beast_Pete
DotA_5v5_Chen_with_reindeer_9_0.w3g ( 727.11k ) Number of downloads: 656
Sentinel: BM + Medusa | Drow | Lancer + SkeletonK
Scourge: Venge + Chen | Lich | Zeus + Nerubass
This one was an IH with one filler unknown guy on our side. Some of the players on both sides are not too good though, but it was equal in skills overall. We manage to get the First Blood at the top and control our lane though it’s not as of a big domination as it could have been (after watching the replay again). I was whining on ventrillo throughout the whole game because I had to wait for my SECOND Centaur for several minutes (15-20 I think). This was an unlucky game in that aspect, but on the other hand I at least did not die which is quite rare for me as I am playing a feeder carry all the time (even with support heroes ^^ ).
This replay is recommended for those who want to see how Chen is being used in the scourge forest and how he is doing in a low-level IH.
DotA 5v5 Chen PL IH 9-0 – played by Beast_Pete
DotA_5v5_Chen_PL_IH_9_0.w3g ( 818.25k ) Number of downloads: 661
Sentinel: Razor + Medusa | Brood | Rexxar + Lucifer
Scourge: Abaddon + Chen | Necrolyte | Bane + Leshrac
An inhouse game with my clan’s players, one of the clan’s friends and with Kovi’s bro.
In the begining I farm in the scourge forest and let Abaddon solo. Later I come to help him out, but as I lacked stompers I couldn’t do much. Then I get a Centaur and go for a kill, but we didn’t succeed. I nearly died, but managed to get out alive. This would have been their only chance to stop me…
Our Leshrac goes top for a kill and the abaddon scored two frags though he nearly died. I switch to the Sentinel forest. The Rexxar wanted to ambush our Bane Elemental but for his surprise we were the oens to ambush him. He nearly died – if I used the stomp properly he would have – and as Lucifer came to help him he died for great justice.
Later we succeed in a gank at the bottom first tower fo Sentinel and get the tower as well. Then when we want to get the top tower I get a message on GGC and my WC3 gets trayed. ^^ But fortunately I could ask them on ventrillo to immediately pause so I did not suicide dive the second tower. After getting the first tower there we swtich to the Sentinel forest and a nice gank gets started. We come out as the winners of that battle and I net 3 frags. If you want to know what happened afterwards then watch the replay of course (you should, anyway).
My endgame items: BoS, Aegis, Mekansm, RoB, Bracers, Bracers and 3600 golds in picket.
This replay is recommended for those who want to see Chen being used in high-level IHs and that it’s not true that he is under-leveled throughout the game if he is used properly. Also the Aegis build is used and its powers can be seen here.
XVI. Conclusion
You have reached the end of our Chen guide. Not only was it very fun making this guide, but we hope that you have also enjoyed reading it. If there is criticism you have for us, feel free to give it to us. If there are any mistakes please point them out.
We would also like to give our credits here. Our first person we would like to credit is PieMonger. His guide format was sort of used in ours, and maybe you can see the resemblance. The second person we would like to credit is MrX for his guide to neutrals which taught is a lot of things about neutrals. The last person we would like to credit is madee[NERV], for his guide to wards. Also thanks for the top-teams whose replays encouraged us to experiment this hero on a higher level and leading us on the way to writing this guide. Thanks for everybody who reads the entire guide and gives feedback accordingly to it.
Source : DotA-Allstars Forum
[tags]Dota, Guide, Tips & Tricks, Strategy, Chen, The Holy Knight, DotA-Allstars Forum[/tags]